Tuesday, July 31, 2012

Early Espresso & Crumb Cake - YUM!

When I saw the monochromatic Dynamic Duos Challenge, all I could think was YUMMY. And I love that color combination - it's one of my favorites! So I was pretty excited to 'attack' it. I also saw a card on Pinterest that piqued my interest. My card is quite different, but it was the starting point for my idea: it had squares folded back with a monster (from Make a Monster) jumping out. Here we just have a sweet little coffee cup and greeting popping out.


This card could easily be made into a masculine card, simply by using a different image from the A Fitting Occasion stamp set. My petal 'frame' is made from four 1-3/4" Circles folded in half.

Tips & Tricks:

*I used the Comfort Cafe DSP for my card. It has a lot of floral and feminine patterns, but it has a few monochromatic and masculine patterns, too.
*I'm still loving the Fancy Fan Embossing Folder. It's so pretty and just adds so much to my cards.
*Yeah, I guess I cheated. I made the heart over my coffee cup pink deviating from the monochromatic theme. But you have to admit, it's pretty cute ;)
*Even though I make bows with my Seam Binding Ribbon (here in Crumb Cake), my favorite way to use it on cards is to tie a simple know in it. This ribbon is perfect for that.

I hope this card inspires you and shows you that monochromatic doesn't have to be boring. And don't forget to check out and 'like' my Facebook Page. I'm doing a giveaway at 225 likes :) 'Til next time, keep letting stamps bring out your creativity!


Card Recipe
Stamps: A Fitting Occasion
Ink: Early Espresso
Paper: Crumb Cake, Early Espresso, Very Vanilla, Comfort Cafe DSP
Accessories: 1-3/4" Circle Punch, 1-3/8" Circle Punch, 1" Circle Punch, 3/4" Circle Punch, Big Shot, Fancy Fan Embossing Folder, Crumb Cake Seam Binding Ribbon, Pretty in Pink Stampin' Write Marker

Monday, July 30, 2012

Quintessential Flower with Summer Smooches

I made this card for both The Paper Players Challenge as well as the Freshly Made Sketches Challenge. But because of busy summer weeks and week-ends, I never got around to posting it before the Freshly Made Sketches Challenge closed. It was a lovely sketch so I'm glad that I got to use it!

The Paper Players Challenge was a super fun one. They set up a tic-tac-toe board and we had to choose three elements for our card in a row: left to right, top to bottom or diagonally. My three elements were a floral card using ribbon and punches.  I decided to combine the Quintessential Flower stamp with the Summer Smooches DSP. I also used all the colors from the DSP on the various layers of the flower.


Tips & Tricks:

*Not sure how to combine a bunch of seemingly different colors together? Grab a sheet of DSP. SU! tells us which colors are in it and which colors will look fantastic together.
*I'm loving the Sweet Essentials stamp set. I needed some more greeting sets, I was getting bored of the ones I have. This set definitely fit the bill!
*I love how the Quintessential Flower is five stamps in one! So many options for one simple stamp :)
*SU! card stock is thick enough to distress and pull apart. I did this on my greeting.
*I love the Baker's Twine, especially the 2011-2013 In Colors twine. It's so cost effective and you get 25 yards in the package. So I don't feel bad when I wrap it around the card stock three times ;)

I love how the colors worked out and love The Paper Players idea for a challenge! So much fun :) 'Til next time, keep letting stamps bring out your creativity!


Card Recipe
Stamps: Quintessential Flower, Sweet Essentials
Paper: Lucky Limeade, Island Indigo, Whisper White, Summer Smooches DSP
Ink: Island Indigo, Tangerine Tango, Real Red, Daffodil Delight, Rich Razzleberry
Accessories: Island Indigo Baker's Twine, 2-3/8" Scallop Circle Punch, 1-3/4" Scallop Circle Punch, 1-1/4" Circle Punch, 3/4" Circle Punch, 1/2" Circle Punch, Stampin' Dimensionals, Basic Jewels - Rhinestones

Saturday, July 28, 2012

Sunday Googly Ghouls

Another Sunday Stamps Challenge. And I guess my post title is a bit odd - but because of the stamp set I used if fits ;)

This challenge was hosted by the fabulous Joan Jeffery of J-J Creations. She has provided us with a gorgeous sketch that can be interpreted in so many different ways. I decided to put my Googly Ghouls stamp set to good use :) I love this set, it's so cute! Can't wait to use it in a Hallowe'en Scrapbooking class.

Although I tend to change up sketches and challenges quite a bit, I loved this sketch so much I pretty much left it as is. I added a scallop circle under my ghouls on the left, but I wanted the mummy to really stand out from the Tangerine Tango, so I left him as is.


Tips & Tricks:

*All the materials in my card are a sneak peek from the Holiday Mini. I absolutely love the Woodgrain Embossing Folder.
*I love the Howlstooth & Scaringbone DSP. If not only for the name ;) There's lots of fun patterns and the colors (Basic Grey, Basic Black, Tangerine Tango and More Mustard) are sooo Hallowe'en!
*You know what I love about the Googly Eyes? They have a little glue dot on the back. So not only are they darned cute, but there's no fuss in getting them onto your card!
*I am loving the Striped Satin Ribbon. It's so perfect with the rest of the Howlstooth & Scaringbone Suite.

If you're loving this Hallowe'en Suite of Products, look for an Accessory Test Drive in September. Try out the products in the suite, a little at a time. More info is available on the blog page above. I'll also be offering a Hallowe'en Scrapbooking Class on September 16th.

'Til next time, keep letting stamps bring out your creativity!


Friday, July 27, 2012

A Fun Sketch for Birthday and Christmas

This is going to be a double post. Try Stampin' on a Tuesday had a fantastic sketch for us this week and when I saw it, I saw two types of cards. A birthday card using Papaya Collage and a Christmas card using Christmas Lodge.

I also made sure to use some super fun DSP's: Fan Fair for the birthday card and Candlelight Christmas for the Christmas card. The Fan Fair DSP coordinates well with the Postage Due stamp set, but I love it with Papaya Collage, too. It has a nice, vintage feel to it and I love the colors.

I really love the rose in that stamp set. It's so pretty, classic and vintage-looking. I thought it looked fantastic in the frame and I especially love the layered roses. What do you think of the button? It's one of the new Natural Buttons. I threaded a bit of Hemp Twine through it to complete the look.

I was inspired to do another Christmas card by the Friday Mashup. The challenge this week was to create a Christmas card and/or decorate the inside of the card. I did both. I chose the Candlelight Christmas DSP (a sneak peek from the Holiday Mini) and I love how it has a sparkly feel to it. A shimmer, just like candlelight. I also finally used my favorite Christmas stamp set this year - Christmas Lodge.


I just love how classic this stamp set is. For this card, something was missing on the 'banner' pieces of DSP. So I added a few Adhesive Pearls at the bottom of them. I love how easy they are to use. This DSP works perfectly with the Christmas Lodge set, too. Classic Christmas. I used my Paper Snips to free-hand the notches in my DSP.

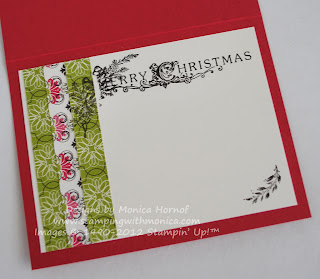
I decorated the inside of my card with the same DSP that I used on the inside of my card. Then I used some of the stamps I hadn't used on the front of the card to make sure the person who received the card knew I wanted them to have a Merry Christmas. :)


I hope you like my two-in one card. I think I'll have to use this sketch a few more times. 'Til next time, keep letting stamps bring out your creativity!


Tuesday, July 24, 2012

Fun with a Thaumatrope

I first saw a thaumatrope on my friend and downline Tara's blog. I have been wanting to make one ever since, but never got around to it. I have a FREE 'Try Out a Stamping Technique Club' class on Sunday and this is one of the cards and techniques that we'll be doing. I still have room if you'd like to come :) I think the thaumatrope is such a fun element and I love the way it 'floats' in the card :)


The butterfly in the center of the Floral Framelits is a removable thaumatrope. I'd give you a tutorial, but the link I've given you is much better than any tutorial I could give you. That said, here are some pictures of what my thaumatrope looks like.

I tied Early Espresso Baker's Twine on both ends of the scallop circle. I pierced holes through the base of the card and ran the twine through the two holes. If I can give any advice (and Tara gave me this advice too) cut the Baker's Twine longer rather than shorter. You'll need it!


Here's what my thaumatrope looks like when untied. When you spin it around the two colors and butterfly styles blend together. Stunning really.


Tips & Tricks:

*I used the sketch at the Friday Mashup Challenge for this card. I really love the simplicity of it and how versatile it is.
*I used the new Lacy Brocade Embossing Folder for the background on my card. I absolutely LOVE this folder. It will be available in the Holiday Mini on August 1st.
*When using two different-sized framelits to make a frame (like the Cajun Craze Flower) cut your large die-cut shape first. Then put your smaller framelit over the larger die-cut and cut out the smaller image to make your frame. To ensure your framelit doesn't move, put a Post-It note over the framelit/card stock to hold it in place.
*I am absolutely loving the Comfort Cafe DSP. Some patterns are fresh and modern, others are more vintage. I can't believe I wasn't sure about this paper when I first saw it ;)


I'm excited to show this card off to the ladies at my class on Sunday. I still have a few spots available and I'd love for you to join us.

'Til next time, keep letting stamps bring out your creativity!


Monday, July 23, 2012

A Little Papillon with International Bazaar

I've used a lot of my new stampin' supplies but some, such as the Vintage Faceted Buttons, have gone unused up 'til now.  Not because I don't like them. It's more of a time issue. I can only craft so much ;) And then there are some supplies, like the Papillon Potpourri stamp set and the International Bazaar DSP, that I would like to use even more. So on this card, I did just that. Lots of different elements, but I think they work well together.


My inspiration for this card was this week's Pals Paper Arts Challenge. I had originally wanted to make two of the DSP flowers (bottom right corner) but it was too busy for the card. So instead I put a Vintage Faceted Button in the corner. The button still draws some attention, but doesn't take over the card.

Tips & Tricks:

*For the DSP flower, I used the new 1-1/4" Scallop Circle Punch. It is in the Holiday Mini and will be available August 1st. I punched 6 scallop circles from the International Bazaar DSP, crumpled them (I know! It seems so wrong to crumple up DSP, but it looks so great) and put them together with a Brights Brad.
*Did you notice the piercing around the Framelit Labels? I used the Festive Paper Piercing Pack, also available in the Holiday Mini. I'm loving how Stampin' Up! is making paper piercing so easy for us with these lovely templates.
*The Papillon Potpourri stamp set has several different styles of butterflies - from a realistic looking one, to a flowery one and then to a more mod one. I thought this more realistic looking butterfly was perfect for this card.
*I've always loved the Word Window punch but I kept waiting on buying it because I was worried it would retire. It works so well with Teeny Tiny Wishes, Fabulous Phrases and other stamps. When I put in my huge order a few weeks back I took the plunge and finally ordered it. I can't believe I didn't have it before ;)
*Not sure how to adhere your buttons? I use the Mini Glue Dots. They're clear so they work with the clear buttons. I used them to adhere my DSP flower on the card, as well.

It's one of my friend's birthday this week so I'll be giving her this card. She loves anything colorful and with a funky pattern. I think this card fits the bill. 'Til next time, keep letting stamps bring out your creativity!


Card Recipe:

Stamps: Papillon Potpourri, Teeny Tiny Wishes
Paper: Pacific Point, Rich Razzleberry, Daffodil Delight, Whisper White, International Bazaar DSP
Ink: Rich Razzleberry
Accessories: Elegant Butterfly Punch, Word Window Punch, 1-1/4" Scallop Circle Punch, Big Shot, Labels Framelits, Paper Piercing Mat, Paper Piercer, Festive Piercing Pack, Mini Glue Dots, Stampin' Dimensionals, 1/4" Stitched Rich Razzleberry Grosgrain Ribbon, Basic Jewels - Rhinestones, Brights Brads


Sunday, July 22, 2012

Lacy, Lovely & Quintessential

I had put the Lacy & Lovely stamp set on my Wish List when I first started going through the new SU! catalogue. I didn't order it right away but then I used it at a stamper's meeting (a perk of being a Demo - Monthly stamping meetings with my upline!!!) and I knew I had to have it. It was on my next order ;)

This week's Freshly Made Sketches sketch made good use of circles and it was absolutely perfect for both the Lacy & Lovely and Quintessential Flower stamps. I love how I can use many different SU! punches to layer the different images in these stamps.


Tips & Tricks:

*The Lacy & Lovely stamp set is made to coordinate with a variety of SU! Circle Punches, including the 2-1/2", 1-3/8" and 1" Circle Punch. That means perfectly punched out shapes and no cutting! What's better, use other circle or scallop circle punches to punch out even more lovely circle shapes.
*Both stamp sets I used for this card is a dream for those who love to layer!


*When I first saw the Comfort Cafe DSP I wasn't sure what I thought. But after using it a few times, I fell in love with it! It has gorgeous feminine and masculine patterns. And the colors are so soothing. I can understand why it's called 'Comfort' Cafe.
*Do you love the embossed background as much as I do? It's the Lacy Brocade Embossing Folder from the upcoming Holiday Mini. At first I thought it may be a bit busy, but it's not at all! And the pattern is so different from anything else we have in the catalogue.
*Do you see the ribbon I stamped the greeting on? It's also from the Holiday Mini. I received this 7/8" Cotton Ribbon in a special bundle FREE from Stampin' Up! Just one of the many perks of being a Demonstrator :) It's smooth, soft and easy to stamp on. I just love the vintage, soft look of it.


I hope you've liked this card. I don't often use Cajun Craze, but I really love how it works with these colors and have been inspired to use it more! 'Til next time, keep letting stamps bring out your creativity.


Card Recipe:

Stamps: Lacy & Lovely, Quintessential Flower
Paper: Soft Suede, Very Vanilla, Comfort Cafe DSP
Ink: Cajun Craze, Summer Starfruit, Soft Suede, Island Indigo
Accessories: 2-1/2" Circle Punch, 1-3/8" Circle Punch, 1-1/4" Circle Punch, 1-3/4" Scallop Circle Punch, 3/4" Circle Punch, 7/8" Cotton Ribbon, Big Shot, Lacy Brocade Embossing Folder, Stampin' Dimensionals, In Color Dahlias

Saturday, July 21, 2012

Sunday Stamps with Postage Due

Another Sunday means another Sunday Stamps Challenge, for which I'm fortunate enough to be a Designer. This week we had a color challenge: So Saffron, Ridinghood Red and Soft Suede. I have to admit, Ridinghood Red is not my favorite red. And since Daffodil Delight came to the Stampin' Up! family, that's really the only yellow I've used. But I absolutely LOVE this color combination and it's so perfect for a vintage-y card.


Even though I still have a few stamp sets I haven't played with, I just *knew* that the Postage Due stamps were perfect for this color combo. It's such a fantastic background stamp and it makes a good focal point, too. I had some 3/8" Ridinghood Red Taffeta Ribbon and it was perfect to add a little something to this card.

Tips & Tricks:

*To age my card a bit, I used my Craft and Rubber Scissors to distress the edges. I also used my Stampin' Sponges and Soft Suede Ink on all of the layers.
*I just love the Eiffel Tower postage stamp image. Even though the postmark on the large background stamp says Manila, I couldn't resist using the Eiffel Tower on my card. It just seems to work so well with the script as well as the bicycle.
 *Tearing the edges of your card stock is another simple way to add a vintage flair to your card. I tear randomly. Most times it works... sometimes I have to re-stamp my image ;)
*Even though this card appears to have a lot of 'elements' to it, because of the large stamp I used and the randomness of the sponging, tearing and distressing, it didn't take too long to put together. It's actually a pretty simple card :)

I hope you'll join us at Sunday Stamps for this wonderful color challenge. I can't wait to see what you come up with! 'Til next time, keep letting stamps bring out your creativity!


Card Recipe:

Stamps: Postage Due
Paper: Ridinghood Red, So Saffron, Very Vanilla
Ink: Ridinghood Red and Soft Suede
Accessories: Stampin' Sponges, Craft & Rubber Scissors, Postage Stamp Punch, Ridinghood Red 3/8" Taffeta Ribbon, Stampin' Dimensionals

Friday, July 20, 2012

Blast Off Birthday

I finally got my hands on the new Blast Off stamp set in the SU! cattie. I absolutely love this set, it's perfect for boys and even girls who love anything to do with space. The two-step stampin' possibilities as well as the coordination with punches is simply fantastic too. I did get this stamp set in wood because I anticipated that the kids will want to use it ~ I was right. I always get stamps for the kids in wood because it's much more user-friendly for wee hands and I don't have to worry about them putting stamps on clear blocks and losing them.

A good friend's son turned 9 yesterday and I really wanted to use this set. I worried that it may be a bit 'young' for him, but he seemed to like the card just fine ;) I was going to use the #9 from Memorable Moments for inside the space ship. but settled on the alien instead. I used this week's Try Stampin' on a Tuesday sketch but I have to admit that I did find this sketch a bit challenging. It was definitely outside my box. ;)


Tips & Tricks:

*I wanted the alien inside my space ship so I stamped him on the Whisper White card stock and stamped the space ship on a separate piece of card stock. Cutting the space ship out was really easy and I punched out the window with the 1-inch Circle Punch. I mounted the whole thing on Stampin' Dimensionals.
*The Polka Dot Parade DSP is perfect for fun, kids cards. The colors are bright and what kid doesn't love polka dots?
*Although the sketch doesn't have the ribbon on it, when I put my card together something was missing. So I wrapped some Daffodil Delight 1/4" Stitched Grosgrain Ribbon and suddenly it came together!
*I added the Basic Jewels - Rhinestones to the space ship to give it a bit of a metallic feel.

I'm glad my friend's son liked this card - I still can't believe he's 9! 'Til next time, keep letting stamps bring out your creativity!


Card Recipe:
Stamps: Blast Off
Paper: Basic Grey, Pumpkin Pie, Whisper White, Polka Dot Parade DSP
Ink: Basic Grey, Old Olive, Pumpkin Pie, Tangerine Tango
Accessories: Modern Label Punch, 1-inch Circle Punch, Paper Snips, Stampin' Dimensionals, Basic Jewels - Rhinestones, 1/4-inch Circle Punch, Daffodil Delight 1/4" Stitched Ribbon

Wednesday, July 18, 2012

Christmas with Delightful Dozen

I know I know, another 34C day in Ottawa and I'm posting about Christmas! Maybe that's why this heat wave has no end in sight? I'm tempting fate... but I had to get one more card ready for my Christmas in July Class on Thursday. I'm totally excited to eat some cookies, stamp some Christmas cards and listen to Christmas music ~ a stampin' friend is bring her Michael Buble Christmas album :)

One of the main reasons I bought the Delightful Dozen stamp set was for the Christmas stamp. It's so elegant, it's gorgeous. It stands out and really is an image in of itself. So when I saw that The Paper Players Challenge this week was to use a word stamp as the focal point/main image on a card, it seemed like this card was meant to be!


The sketch is my own. I've been working on my own sketches for a little project I'm planning for the fall... don't want to release details yet, but stay tuned, it will be exciting! I also used the strip of circles stamp from the new Chock Full of Cheer stamp set which coordinates perfectly with the gorgeous Be of Good Cheer DSP. Who would've thought that Gumball Green would look so great with Cherry Cobbler? I'm not usually a big fan of bright green, but I do love this one!

Tips & Tricks:

*I really wanted the greeting to stand out so the layer which it is stamped on is quite big.
*When I put my card together, it looked good. But, something was missing. I added a few Basic Jewels - Rhinestones to the stamped ornaments and suddenly the card was 'fixed' ;) Still love those jewels!
*Because I don't have to 'smoosh' my stamps into the new Firm Foam Stampin' Pads to get good ink coverage, I rarely have to worry about having 'rock' lines on my cards. Look at how crisp the images come out!

Hopefully this card doesn't set us up for an even longer heat wave. I think my hydro bill is going to be the highest ever this summer... better get stampin' to pay it! ;) 'Til next time, keep letting stamps bring out your creativity!


Tuesday, July 17, 2012

A Bit of Papillon Potpourri

I have to admit, when I first saw the new Elegant Butterfly Punch and coordinating Papillon Potpourri stamp set I was underwhelmed. I liked the old one better. But once I used it, saw some samples with it, played with it a bit more, it slowly grew on me. And now there's no going back! I got both items in my huge order last week and was itching to play with them. My Mother-in-Law's birthday is today and I made her a sweet card with the stamp set as well as the Twitterpated DSP.


My inspiration for this card came from this week's Friday Mashup Challenge. Our challenge was to make a card using a banner or flag, make a project with matching envelope, or mash it up and do both. Without realizing it, I did both! I meant to make just the matching envie, but I ended up using the Bitty Banners Framelits and coordinating stamp set.

Tips & Tricks:

*Do you like the embossing? It's a sneak peek from the Holiday Mini - Holiday Frame Embossing Folder. But I think it works just fine for a birthday ;) Stay tuned for cards using this embossing folder and the coordinating stamp set, Joyous Celebrations.
*I still love the Itty Bitty Banners. I use them in coordination with the Framelits or on their own. Either way, I use them a lot!
*With Papillon Potpourri, creating a coordinating envelope was easy! I did some 2-Step Stampin' with a smaller butterfly and then put a few butterflies on the back flap. This adds so much to the card you're giving!
*To give my butterfly a little bit of extra dimension, I punched out two pieces of Twitterpated DSP. I love how it makes my butterfly look like it is 'taking flight'.
*I loved this card so much I wanted to include it in my Fast & Fabulous Monthly Card Class. I simplified it a bit and I hope the class goers will love it!

My Mother-in-Law loved her card (how could she not?!?!?) and I'm so glad! I love the colors and my new house and studio must have been on my mind because those are the colors we painted the kids' rooms, lol! I tend to incorporate SU! into everything I do ;)

'Til next time, keep letting stamps bring out your creativity!


Sunday, July 15, 2012

Christmas and Hallowe'en - in July!

As Eastern Ontario roasts in this crazy heat wave, I've been playing with my new Holiday Mini Products. There are tonnes of awesome stamp sets as well as brand new accessories in this Mini. What's more, SU! has included more Framelits, Piercing Templates and Big Shot Dies. Awesome ~ it's like they're reading my mind ;)

So first we'll do Christmas. This card uses the new Ornament Keepsakes stamp set. I did use the 1-3/4" Circle Punch but for the ornament, but the Holiday Ornaments Framelits have been made to perfectly coordinate with all the ornaments. I say it all the time, but I love all the product coordination :)


I'm loving the Candlelight Christmas Specialty DSP. It has gorgeous colors (Real Red, Early Espresso, Very Vanilla, Lucky Limeade and others) as well as classic patterns. I was so excited to break into it and use it on this card! On Thursday July 19th, I'm doing my Christmas in July Class and I'm very excited for the ladies to do this card!

The second card I have for you today is a Hallowe'en card! The minute I saw the Googly Ghouls stamp set in the Mini, it screamed 'The kids will love it!' and 'What an awesome scrapbooking stamp set!'. What child doesn't love 'googly eyes'. Heck, *I* love googly eyes! The stamp set has images of a mummy, Frankenstein, a witch and two others. I did use the Retro Sketches #19 Challenge from last week for my card below.


Do you like the DSP? It's the new Howlstooth and Scaringbone DSP. It will be perfect for scrapbooking too! Love the colors ~ Tangerine Tango, Basic Grey and More Mustard. And what about the ribbon? It's satin, it's striped and it's gorgeous! I'm still trying to figure out a way to work it into my Christmas cards. I really wish SU! did this ribbon in a Very Vanilla and Cherry Cobbler or something else Christmas-y. But I'll find a way to make it work.

Hope you've enjoyed these little sneak peaks. Like I said before, how can you *not* like the googly eyes??? lol! Stay tuned for more info on my scrapbooking class. There's also a sweet Hallowe'en treat kit in the Mini that coordinates with this stamp set... Lots of project ideas floating around in my head ;)

'Til next time, keep letting stamps bring out your creativity!