Well, I'm writing this on March 30th, but most of you will see this on March 31st: the last day of Sale-a-Bration. The LAST day! How did over two months go by so quickly? I think my favorite product from this year's SAB was the Everyday Enchantment DSP. This paper is SO gorgeous, I really hope it somehow, magically carries over into the new catalogue. But that is probably just a dream, so I'll use it one more time!
How adorable is this little purse? It's a new Big Shot die: the Petite Purse Bigz L Die. Although the DSP is only available 'til tomorrow, this new die will be available from April 1st to April 30th and then in the new catalogue.
The photo above gives you an idea of how big the purse is. The little note cards are 1-3/4" x 1-3/4". Aren't they cute? The little purse is also perfect for a couple of chocolates, a little pillow gift such as lip balm - the possibilities are endless!
Tips & Tricks:
*I love the SAB Everyday Enchantment Brads so much I used one on my purse on the 'tab'.
*The variety of patterns and colors in the Everyday Enchantment DSP is amazing! I decided to go with the Lucky Limeade, Pool Party and Soft Suede colors for this project.
*The Petite Purse die is so well designed ~ a couple of folds, a bit of Sticky Strip and it comes together easily. No fumbling with a tricky die.
*The purse die does come with a handle, but I decided to do something I've seen a few other demos do: I used the Scallop Ribbon Border Punch. Love it!
*Don't miss out on SAB 2012 ~ for every $60 you order you'll get a free SAB product. Check out my Online Store before it's too late!
Hope you have all enjoyed SAB 2012 as much as I have! But don't fret, in April we'll have more fun stuff for you of course ;) 'Til next time, keep letting stamps bring out your creativity.
Friday, March 30, 2012
Thursday, March 29, 2012
Two Days Left to Sale-a-Brate!!!
Say it isn't so! We only have two days left to get a free Sale-a-Bration item with every $60 in product we order! I always find the end of March so hard. I can't use my gorgeous Sale-a-Bration stamp sets, DSPs and accessories in classes anymore (of course I can for my own projects! ;) ) and my customers don't get a freebie with their orders. After two months, it's easy to get used to, lol!
So using this week's Freshly Made Sketch as inspiration, I made a card full of Sale-a-Bration inspiration. I used the Everyday Enchantment DSP as well as the Ribbon & Brad Pack. I also use the Fresh Vintage stamp set. You'll notice that on the bottom flag I used the Tiny Tags stamp set which isn't part of Sale-a-Bration. But I thought it worked for this card.
Tips & Tricks:
*Love what I did with the Fresh Vintage flower? The technique is called Emboss Resist. I embossed the flower with White Stampin' Embossing Powder and then sponged around it with Soft Suede Ink. The melted embossing powder 'resists' the ink. Don't you love how it just 'pops' out from the card?
*On its own, the Calypso Coral strip of card stock looked too plain so I embossed it with the Lattice Embossing Folder.
*Yes - you see correctly. I have made my own envelope from the Everyday Enchantment DSP using the new Simply Scored Diagonal Board. How awesome is it that we can make our own envelopes with four score lines???
*I have a thing for flagging these days, so I flagged all my DSP strips :) I used my Bone Folder to curl the edges.
It is going to be *so* hard to bid all these gorgeous products farewell on Saturday :( I know SU! always has gorgeous new things all ready for us to fall in love with, but this time, the DSP, the ribbon, the printed brads - yep, I'm in premature mourning. But don't you worry, I'll be back with more SAB goodies before it's over ;)
'Til then, keep using your SAB goodies and keep letting stamps bring out your creativity!
So using this week's Freshly Made Sketch as inspiration, I made a card full of Sale-a-Bration inspiration. I used the Everyday Enchantment DSP as well as the Ribbon & Brad Pack. I also use the Fresh Vintage stamp set. You'll notice that on the bottom flag I used the Tiny Tags stamp set which isn't part of Sale-a-Bration. But I thought it worked for this card.Tips & Tricks:
*Love what I did with the Fresh Vintage flower? The technique is called Emboss Resist. I embossed the flower with White Stampin' Embossing Powder and then sponged around it with Soft Suede Ink. The melted embossing powder 'resists' the ink. Don't you love how it just 'pops' out from the card?
*On its own, the Calypso Coral strip of card stock looked too plain so I embossed it with the Lattice Embossing Folder.*Yes - you see correctly. I have made my own envelope from the Everyday Enchantment DSP using the new Simply Scored Diagonal Board. How awesome is it that we can make our own envelopes with four score lines???
*I have a thing for flagging these days, so I flagged all my DSP strips :) I used my Bone Folder to curl the edges.
It is going to be *so* hard to bid all these gorgeous products farewell on Saturday :( I know SU! always has gorgeous new things all ready for us to fall in love with, but this time, the DSP, the ribbon, the printed brads - yep, I'm in premature mourning. But don't you worry, I'll be back with more SAB goodies before it's over ;)
'Til then, keep using your SAB goodies and keep letting stamps bring out your creativity!
Wednesday, March 28, 2012
Packed for a Birthday
I wanted to make another card for my Man Class that I will be holding on April 20th. I'm looking forward to this class because masculine cards are so hard to come by. So many stamp sets are feminine and it's the type of cards my customers struggle with the most.
I used this week's Mojo Monday Sketch Challenge as inspiration for my card design. I did change it up a little and left only a little bit of the grey on the left side. But it's close :) I wanted to pack the Happy Birthday sentiment into this card, so I used the Delightful Dozen and Packed for Birthday stamps.
Tips & Tricks:
*Worried about coloring in stamps with a lot of line art? Spot color! Use those stamps and only color in a few images or certain elements on the stamp.
*I embossed the white strip of card stock with the Lattice Embossing Folder.
*Even though many of the Stampin' Up! stamps are feminine, you don't necessarily need big images on your masculine cards. The birthday stamp from Delightful Dozen is a perfect 'man' stamp. The cake just adds a bit of fun ;)
Hope you'll join me at my class! 'Til next time, keep letting stamps bring out your creativity!
I used this week's Mojo Monday Sketch Challenge as inspiration for my card design. I did change it up a little and left only a little bit of the grey on the left side. But it's close :) I wanted to pack the Happy Birthday sentiment into this card, so I used the Delightful Dozen and Packed for Birthday stamps.
Tips & Tricks:
*Worried about coloring in stamps with a lot of line art? Spot color! Use those stamps and only color in a few images or certain elements on the stamp.
*I embossed the white strip of card stock with the Lattice Embossing Folder.
*Even though many of the Stampin' Up! stamps are feminine, you don't necessarily need big images on your masculine cards. The birthday stamp from Delightful Dozen is a perfect 'man' stamp. The cake just adds a bit of fun ;)
Hope you'll join me at my class! 'Til next time, keep letting stamps bring out your creativity!
Sunday, March 25, 2012
Quilting with Twitterpated DSP
When I started stamping, 4 years ago, I got my first package of DSP and was scared to use it. It was so pretty, I didn't want to use it 'wrong'. Then I got more DSP. And more. But I never wanted to use it! lol! How silly is that? I now tell my customers to not hoard their DSP and ribbon; they are very pretty but they're of no use to anyone if they are not being used.
So, now I crack open and use my DSP the minute I get it. I use it in my classes, private workshops, in my own projects. This also means I'm left with lots of scraps. For the Friday Mashup Challenge this week, we were asked to:
1) Make a project using the Quilting Technique; or
2) Make a project using something that has been forgotten (or sitting in our stash forever); or
3) Mash it up and create a quilted card with something that you've forgotten about.
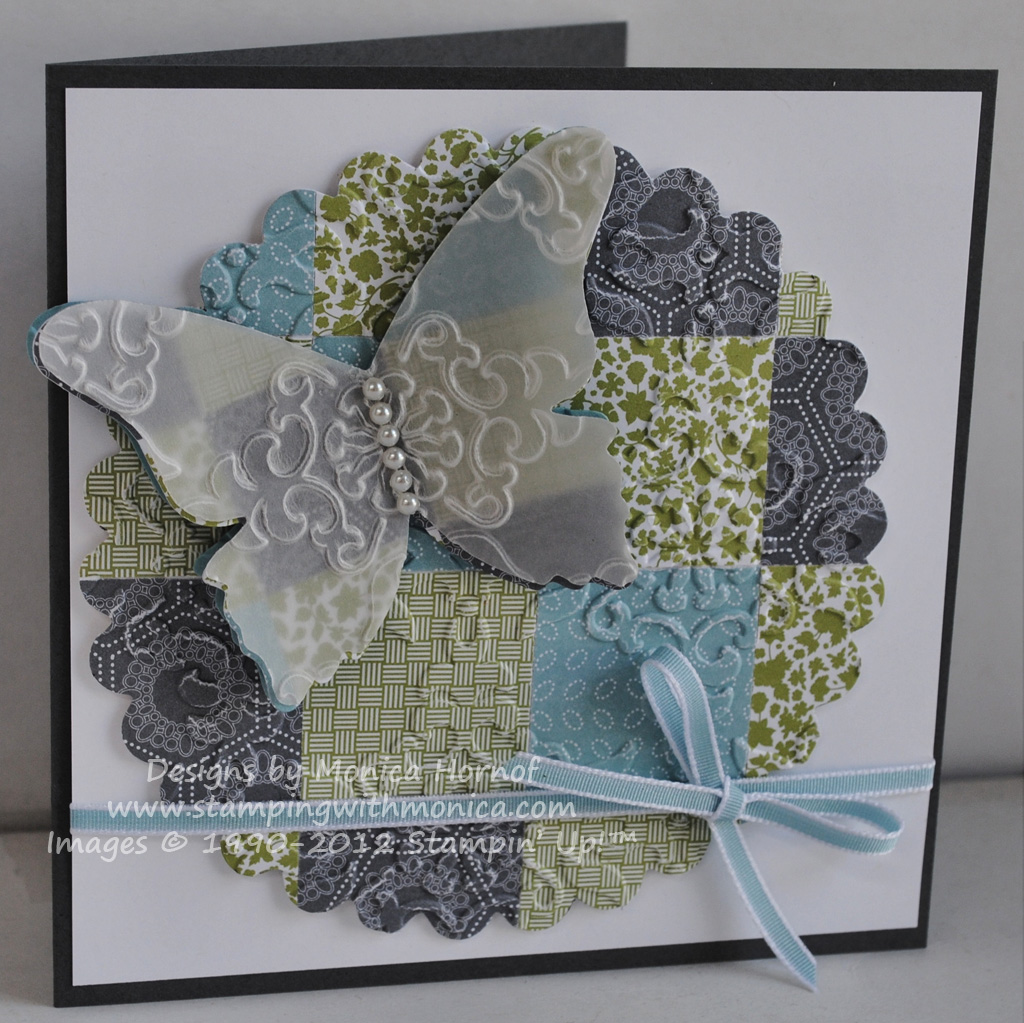
I've used the Twitterpated DSP a lot so I had tonnes of scraps, perfect for 'quilting'. Even though the DSP has a lot of Blushing Bride colored patterns, I didn't want to do pink and focused on the Pear Pizzazz, Basic Grey and Baja Breeze.
For the 'forgotten' in my stash part of the challenge... I've used the Beautiful Butterflies die lots in the past and I love it, but it just hasn't been used lately. Same thing with my Vellum Paper. So I pulled them out and made my 3 layer butterfly.
Tips & Tricks:
*For my quilted scallop circle, I punched 1-1/4" squares out of the DSP and adhered them to a piece of card stock. Once they were all stuck on I ran it through the Scallop Circle Die. Then for a bit of extra texture, I ran the whole thing through the Vintage Wallpaper Embossing Folder.
*I love how vellum looks overtop DSP - you just see a hint of it through the vellum. I quilted the middle butterfly too.
*The base of the butterfly is just Baja Breeze card stock embossed with the Vintage Wallpaper Embossing Folder.
*I don't use the strips of adhesive jewels enough. I love how they 'bedazzle' my butterfly!
*Embossed Vellum is beautiful, but make sure you're using the Vellum Card Stock, not the Paper. The card stock is a bit thicker and holds up better.
*I don't often tie real bows, just cheater bows (knots). But the 1/8" Taffeta Ribbon is flexible enough to make tying a nice bow easy.
I'm not too sure who I made this card for yet. Though I think it may just be too beautiful to give away ;) 'Til next time, keep letting stamps bring out your creativity!
So, now I crack open and use my DSP the minute I get it. I use it in my classes, private workshops, in my own projects. This also means I'm left with lots of scraps. For the Friday Mashup Challenge this week, we were asked to:
1) Make a project using the Quilting Technique; or
2) Make a project using something that has been forgotten (or sitting in our stash forever); or
3) Mash it up and create a quilted card with something that you've forgotten about.
I've used the Twitterpated DSP a lot so I had tonnes of scraps, perfect for 'quilting'. Even though the DSP has a lot of Blushing Bride colored patterns, I didn't want to do pink and focused on the Pear Pizzazz, Basic Grey and Baja Breeze.
For the 'forgotten' in my stash part of the challenge... I've used the Beautiful Butterflies die lots in the past and I love it, but it just hasn't been used lately. Same thing with my Vellum Paper. So I pulled them out and made my 3 layer butterfly.
Tips & Tricks:
*For my quilted scallop circle, I punched 1-1/4" squares out of the DSP and adhered them to a piece of card stock. Once they were all stuck on I ran it through the Scallop Circle Die. Then for a bit of extra texture, I ran the whole thing through the Vintage Wallpaper Embossing Folder.
*I love how vellum looks overtop DSP - you just see a hint of it through the vellum. I quilted the middle butterfly too.
*The base of the butterfly is just Baja Breeze card stock embossed with the Vintage Wallpaper Embossing Folder.
*I don't use the strips of adhesive jewels enough. I love how they 'bedazzle' my butterfly!
*Embossed Vellum is beautiful, but make sure you're using the Vellum Card Stock, not the Paper. The card stock is a bit thicker and holds up better.
*I don't often tie real bows, just cheater bows (knots). But the 1/8" Taffeta Ribbon is flexible enough to make tying a nice bow easy.
I'm not too sure who I made this card for yet. Though I think it may just be too beautiful to give away ;) 'Til next time, keep letting stamps bring out your creativity!
Thursday, March 22, 2012
Happy 43rd!
My parents were married the First Day of Spring. I find that incredibly romantic, much more so than Valentine's Day or Christmas weddings. There's something about spring. Sun, warmer weather, flowers blooming, birds chirping, new beginnings. It's also really easy for me to remember that it's their anniversary ;)
To celebrate these 43 years of marriage I made them a card. I went for a simple look today, based on this week's Freshly Made Sketch. Instead of circles, as suggested in the sketch, I pulled out my Framelits and used the hearts. This is definitely a unique sketch and I love how fresh and clean the card turned out. I used the Attic Boutique DSP which is full of fresh, romantic colors and flowers.
I'll be seeing my parents tomorrow and I really hope they like this card. I'm not 100% sure where I got the idea to make a heart frame and run a ribbon through it. But I love how it turned out!
Tips & Tricks:
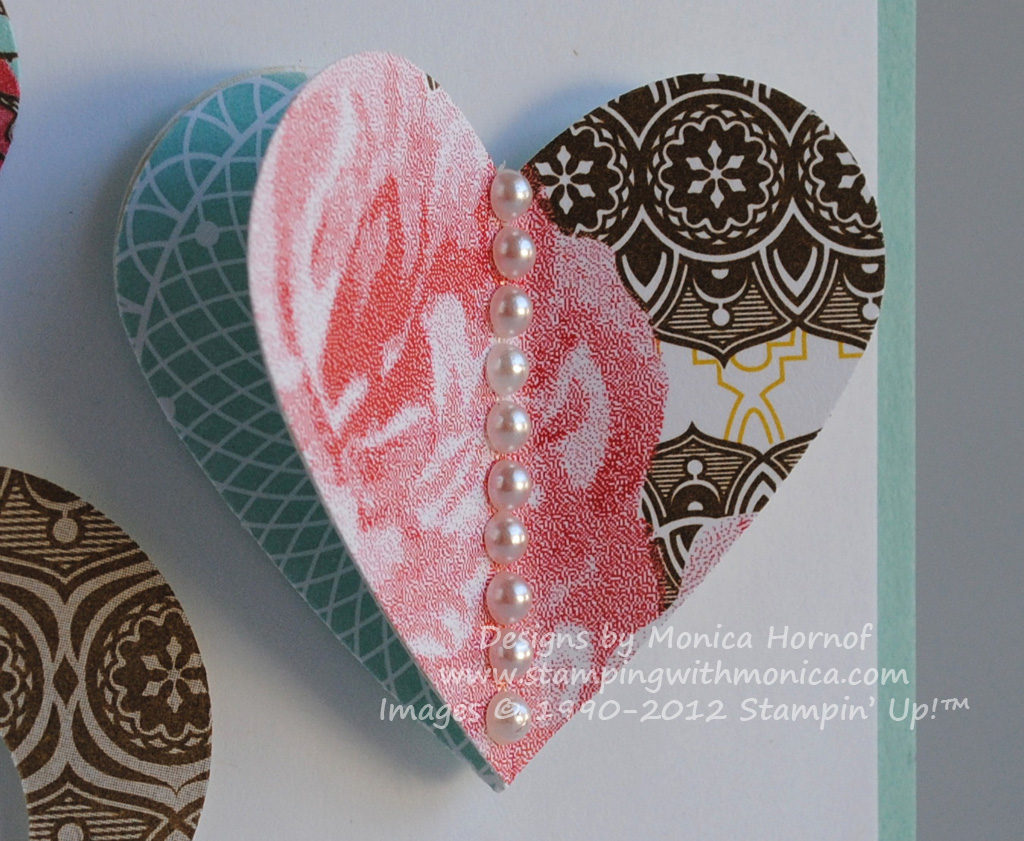
*Anyone who has stamped with me knows how much I love my 3D punched shapes. I've used the butterflies a lot, but lately I've been loving the 3D hearts.
*Aren't Adhesive Pearls just so romantic? I think they add a classic touch to the card.
*When making a frame with the Framelits, cut out the larger shape first and only then cut the smaller heart out to make your frame. This will prevent the Framelits from slipping onto each other.
*I contemplated using the Pool Party Seam Binding Ribbon but it seemed a bit too wide for the heart frame. I used the Ruffled Ribbon instead and I think it was just the right size.
*Sometimes less is more. I could have embossed the Whisper White Card Stock, I could have added some more embellishments, but for this card, I wanted to keep it simple and *fresh*.
I'll let you know next time what my parents thought. 'Til then, keep letting stamps bring out your creativity!
To celebrate these 43 years of marriage I made them a card. I went for a simple look today, based on this week's Freshly Made Sketch. Instead of circles, as suggested in the sketch, I pulled out my Framelits and used the hearts. This is definitely a unique sketch and I love how fresh and clean the card turned out. I used the Attic Boutique DSP which is full of fresh, romantic colors and flowers.
I'll be seeing my parents tomorrow and I really hope they like this card. I'm not 100% sure where I got the idea to make a heart frame and run a ribbon through it. But I love how it turned out!
Tips & Tricks:
*Anyone who has stamped with me knows how much I love my 3D punched shapes. I've used the butterflies a lot, but lately I've been loving the 3D hearts.
*Aren't Adhesive Pearls just so romantic? I think they add a classic touch to the card.
*When making a frame with the Framelits, cut out the larger shape first and only then cut the smaller heart out to make your frame. This will prevent the Framelits from slipping onto each other.
*I contemplated using the Pool Party Seam Binding Ribbon but it seemed a bit too wide for the heart frame. I used the Ruffled Ribbon instead and I think it was just the right size.
*Sometimes less is more. I could have embossed the Whisper White Card Stock, I could have added some more embellishments, but for this card, I wanted to keep it simple and *fresh*.
I'll let you know next time what my parents thought. 'Til then, keep letting stamps bring out your creativity!
Subscribe to:
Posts (Atom)