Showing posts with label Holiday Cards. Show all posts

Sunday, July 15, 2012

Christmas and Hallowe'en - in July!

As Eastern Ontario roasts in this crazy heat wave, I've been playing with my new Holiday Mini Products. There are tonnes of awesome stamp sets as well as brand new accessories in this Mini. What's more, SU! has included more Framelits, Piercing Templates and Big Shot Dies. Awesome ~ it's like they're reading my mind ;)

So first we'll do Christmas. This card uses the new Ornament Keepsakes stamp set. I did use the 1-3/4" Circle Punch but for the ornament, but the Holiday Ornaments Framelits have been made to perfectly coordinate with all the ornaments. I say it all the time, but I love all the product coordination :)


I'm loving the Candlelight Christmas Specialty DSP. It has gorgeous colors (Real Red, Early Espresso, Very Vanilla, Lucky Limeade and others) as well as classic patterns. I was so excited to break into it and use it on this card! On Thursday July 19th, I'm doing my Christmas in July Class and I'm very excited for the ladies to do this card!

The second card I have for you today is a Hallowe'en card! The minute I saw the Googly Ghouls stamp set in the Mini, it screamed 'The kids will love it!' and 'What an awesome scrapbooking stamp set!'. What child doesn't love 'googly eyes'. Heck, *I* love googly eyes! The stamp set has images of a mummy, Frankenstein, a witch and two others. I did use the Retro Sketches #19 Challenge from last week for my card below.


Do you like the DSP? It's the new Howlstooth and Scaringbone DSP. It will be perfect for scrapbooking too! Love the colors ~ Tangerine Tango, Basic Grey and More Mustard. And what about the ribbon? It's satin, it's striped and it's gorgeous! I'm still trying to figure out a way to work it into my Christmas cards. I really wish SU! did this ribbon in a Very Vanilla and Cherry Cobbler or something else Christmas-y. But I'll find a way to make it work.

Hope you've enjoyed these little sneak peaks. Like I said before, how can you *not* like the googly eyes??? lol! Stay tuned for more info on my scrapbooking class. There's also a sweet Hallowe'en treat kit in the Mini that coordinates with this stamp set... Lots of project ideas floating around in my head ;)

'Til next time, keep letting stamps bring out your creativity!


Friday, June 15, 2012

A Little Father's Day Oops ;)

Well ladies, sometimes I need to take a moment and actually *read*. Because sometimes I read too fast and that's where mistakes happen... My friend and downline, Tara Murphy, is hosting the Friday Mashup Challenge as the Designer today. So I went into my email, uploaded her post and saw that today's challenge was to do 'paper piercing' and/or use the color combination of Daffodil Delight, Rich Razzleberry and Pool Party.

I wanted to make a Father's Day card. So I knew the color combination was out and got busy paper piercing.  I haven't gotten the new SU! Essential Paper Piercing Pack so I used my retired Mat Pack as a piercing guide. (But watch out, next week I get the new Piercing Pack and I'll be piercing away cool patterns ;) ). I pierced all around the Whisper White square as well as in the Island Indigo scallop.


Looks great, right? But here's where the oops comes in... The challenge wasn't paper piercing, it was paper piecing. I'm so glad Tara told me that while I was making the card. I consulted the tutorial she did for Friday Mashup. Then I rejigged the design a bit. I already had the 24-7 heart stamp on my card. I then stamped it on Pool Party DSP and cut out the heart. And voila - a paper pieced card. Minimally pieced, but pieced nonetheless :)

Tips & Tricks:

*The Square Lattice Embossing Folder is fantastic for men's cards. I do find that I can use Tab 2 on my Multipurpose Platform (for the Big Shot) because it embosses so strongly. I just don't need as thick a sandwich.
*I love combining Island Indigo and Pool Party together. Especially with the In Color Ruffled Ribbon. Just awesome!
*I really like stamping on DSP. The pattern on the paper adds that 'je ne sais quoi' to your project.
*The piercing turned out really well. I love how the piercing guides help achieve even spaces between my holes.
*Making men's cards can be really challenging. A lot of stamp sets are geared towards women. But since the kids will be giving this card to their daddy, I thought the 24/7 heart image was more than appropriate ;)

I wish all daddies a very Happy Father's Day - I'm sure a lot of the crafty moms have been busy making gifts and cards for the daddies with the kids :) 'Til next time, keep letting stamps bring out your creativity!



Wednesday, May 9, 2012

And now... A card for Dad!

I've made quite a few cards for mom lately so I thought that this time, I should maybe make a card for Dad :) Father's Day is coming up in a few weeks and I've got to start planning for my May Fast & Fabulous class! I love the Best Dad Ever stamp set for anything masculine, but especially Father's Day cards. Even if a Dad doesn't actually *wear* ties, a tie still says 'Dad'. ;)

This week, I also decided to participate in a brand spanking new challenge called the Dynamic Duos. It's Challenge #1! So exciting! This weeks Challenge asked us to use Pool Party and Lucky Limeade. Those are the ONLY colors we could use except any neutrals (Whisper White, Very Vanilla, Crumb Cake, etc.). I love this type of Challenge, it really stretches the imagination!

So how'd I do? I think it turned out pretty well! Other than the Whisper White, I really only did use the two colors we were supposed to use :) I did recycle last week's Freshly Made Sketch for this card too... I had made a spinner card with the sketch, but I think this works well too - love this sketch!

Tips & Tricks:

*I just love the 2011-2013 In Colors so much that I got the In Color DSP Paper Stack. DSP in the five gorgeous colors. That's where the Pool Party polka dot DSP came from :)
*To match my polka dot DSP with the Pool Party card stock, I embossed it with the Polka Dot Embossing Folder.
*I love doing the two-tone ties. They're so easy to cut out. I mount the cut out tie on Stampin' Dimensionals to give my card a bit of extra dimension.
*I love Whisper White as a card base! It's easy to write in, as well.
*For my greeting, I used a 1/2" strip of card stock and then free-handed the notches. You don't *always* need a punch ;)


I hope my class-goers love this card, and I hope that the Dads do too :) 'Til next time, keep letting stamps bring out your creativity!


Bright Blossoms for Mother's Day

Another Mother's Day card coming today :) I made the spiral card last week for my MIL and I needed a card for my own mom too, of course. I was already planning on using the color combo in last week's Pals Paper Arts Challenge ~ Calypso Coral, Baja Breeze and So Saffron ~ but I wasn't sure what sketch to use. I was browsing a friend and downline's blog and came across the Retro Sketches Challenge. I loved this week's sketch so I flipped it and combined it with the color combination I was going to use.


I wanted to show off the color contrast as much as possible. As luck would have it, the Bright Blossoms stamp set (a 2012-2013 cattie sneak peek) has three larger flower images. I stamped and cut each of them out. I used Stampin' Dimensionals to adhere them to my card so that they popped out a bit. I love how it all turned out.

Tips & Tricks:

*I don't *love* cutting images out, I much prefer punches. But sometimes to get the effect I want, it's necessary. I always use my SU! Paper Snips to help me out ~ LOVE them.
*See how the 'Mom' is written in the three-color combination too? I used my Stampin' Write Markers for that. Love how I can stamp with them because they have the same ink in them as the ink pads.
*Yeah, the Seam Binding ribbon frays more easily than others. But I think that just adds to its charm. And you can't deny that the sheen it has is just gorgeous.
*I couldn't make a spiral card for one mom and not the other ;) So I used the smaller floral images from Bright Blossoms for the spiral inside this card.

I hope our moms love their cards! I've just received my new catalog preorder so I've got to run to play ~ after I get my son down for his nap. Be on the look out for more sneak peeks. 'Til then, keep letting stamps bring out your creativity!


Tuesday, March 20, 2012

Easter Wishes

This week's Mojo Monday Challenge was so lovely. I loved the idea of using two contrasting papers on the background. And the scalloped border. I have a Fast & Fabulous Card Class coming up on Wednesday March 28th and used this sketch for an Easter card.

I also won a new stamp set at a downline meeting last week ~ Heaven Blessed ~ and was super excited to use the image of the cute little girl hunting for eggs. For those who have little boys, there's an equally cute little boy image ;)


Tips & Tricks:

*I used the 2011-2012 Hostess DSP, Cheerful Treat, for my card. I know Easter is all about pastels and this DSP is a bit brighter than typical Easter colors, I think it still works :)
*I colored in the whole image of the little girl, but you could easily spot color a few key details such as the eggs, shoes and little girl's hair bow. Use our Stampin' Write Markers for a perfectly coordinated image.
*I love these Twitterpated Designer Buttons. They are so cute and work so well for a spring or Easter project.

Another quick post for tonight ~ exhausted from all the packing and decluttering. I'm very excited by our new house, but very tired from all this house stuff ;) 'Til next time, keep letting stamps bring out your creativity!

Wednesday, December 7, 2011

Layers Upon Wonderful Layers

It was like Christmas in Stamping Monica's stampin' studio today ~ my Occasions Mini preorder came! I ordered WAAAAAY more than I was planning and also got a ton of FREE loot... just because SU! is such a fantastic company :) :) :) I love love love being a demonstrator!

There were tonnes of awesome new products in the Mini: pleated ribbons, designer buttons, Framelits (Big Shot dies that create shapes in multiple sizes, similar to Spellbinders dies), Edgelits (card stock edge cutters) and coordinating edge embossing folders! Oh and some really great stamp sets. And Designer Papers. Actually everything :) I also got a bunch of Sale-a-bration loot (SAB runs from Jan 24 to March 31).

Gorgeous Pleated Ribbon and Designer Buttons

Today, I had absolutely no idea where to start. None. So many great products, which ones to work with??? I had to make a project for my upcoming stampers group (I promised them a project with new products) as well as some swaps. The swap cards will be a smidge different to make them a bit easier to make, but the idea will be the same.


I also chose to use the new stamp set P.S. I Love You. It is a super Valentine's stamp set, perfect for kids' valentines, as well as adult ones. This super cute sketch is from Freshly Made Sketches. It's a keeper, for sure. I love the Heart Framelits, coordinating hearts, or make a frame! Place it right over an image and cut it out with precision. Totally AWESOME :)

Tips & Tricks:

*My 3D butterfly and ornament have been real hits! So I thought, why not do it with the Heart Punch and coordinating image from P.S. I Love You. Need some details on how to make the 3D heart? Here's a previous Blog Post on 3D Butterflies - different punch, same idea :)
*This card is an angled easel card. I saw this concept at a demo meeting about a month ago and have been making it ever since. Love. It.
*I cut cupid out by hand ~ sometimes doing a bit of cutting has a great effect.
*Like the Designer Paper? It's the new Twitterpated DSP. It coordinates with the Blushing Bride Pleated Ribbon and Twitterpated Designer Buttons, both used on this card. Isn't it gorgeous?

I hope you've enjoyed this little Sneak Peek :) I'll be back with more soon because there's just so much awesome stuff! 'Til next time, keep letting stamps bring out your creativity!

Wednesday, November 30, 2011

Design Shake-up

I have my monthly Fast & Fabulous Class tonight and the ladies are going to make 6 gorgeous Christmas cards. I do this class the last Wednesday of every month and it's always a big hit! I had a few Christmas card kits left over and ran out of Whisper White Card Stock... again (it's been a busy season!) so I decided to shake-up one of my previous designs. I also made it work with this week's Freshly Made Sketch. When you're as busy as I am, you have to multitask ;) Here is the original:


Based on this sketch


I came up with the card below. Not sure which one I like better, though I'm leaning to this new one :)


Tips & Tricks:

*I love SU!'s A la Carte stamps, such as the one above. I ink up my Something for Christmas stamp, stamp it down and voila - my card is almost done!
*You can't go wrong with punches, stamps, DSP and ribbon. Five minutes and this cute card was done!
*Want to stamp in bulk but not make the same card over and over? Try changing up the design just a bit on each card. Keeps your creativity going wile simplifying your card prep.

I hope you've enjoyed this card. Can't believe tomorrow is December and we'll *really* be in the Christmas season. I have one last Christmas card class next week so if you need more cards, don't forget to sign up :)

'Til next time, keep letting stamps bring out your creativity!

Tuesday, November 8, 2011

Snowflake Shaker Card

I just love shaker cards. They are super fun for kids and adults. Who doesn't like shaking a snowglobe. Well, this is the same idea but in a card :) I had to design a project for my Stamper's Group on Saturday and knew we would be using SU!'s new Shaker Frames and Mica Flakes. But I had no idea what my card would look like. Then I saw this week's lovely Mojo Monday Sketch. And my card materialized.

I've been using the Sweet Snowglobe so much this year, I wanted to do something different. So I used the gorgeous big snowflake from the Snow Swirled stamp set. I also wanted to show my ladies how to emboss ~ many of them haven't done it before. Our embossing will be done using the gorgeous new Pewter embossing powder.


Tips & Tricks:

*I love the new Shaker Frames. They make making shaker cards a snap! I've had a lot of questions on how to use them. I will be back with a tutorial next week, after my ladies have done their class. 
*Use SU!'s Window Sheets to create the window on your shaker. They can be punched with punches, cut with a paper cutter or die-cut with the Big Shot.
*To create interesting dimension, I embossed both the Whisper White layer and Marina Mist 2-1/2" circle with the Snowburst Embossing Folder. I love the look!
*The Shaker Frames are about 1/8" high whereas Stampin' Dimensionals are about 1/16" high. To adhere my top Marina Mist layer, I doubled up on the Dimensionals - one on top of the other!
*Yes, I used retired ribbon. It's the 1-1/4" Early Espresso Ribbon. But it worked so well with this card :)

Hope you've enjoyed my card and love my little 'snow flurry'. I also hope my ladies will love it on Saturday. 'Til next time, keep letting stamps bring out your creativity!

Friday, October 28, 2011

Waffle Ribbon - A Great Element of Style

I love the new Waffle Ribbons in the Holiday Mini. They are not as thick as they look in the picture, satiny and simply gorgeous. Their beauty and uniqueness easily makes them the focal point on any card. This week's Pals Paper Arts Challenge asked us to use ribbon as the element of style in our card this week.

As you know from my last post, I just got my beloved Christmas Lodge stamp set (why oh why did I wait 3 months to order this?!?!?) and wanted to use it with today's project as well. I then decided to kill two birds with one stone because I wanted to use this stamp set for my third Crazy 4 Christmas class along with the Early Espresso Waffle Ribbon. I just love this gorgeous Christmas tree and love the font of the greetings in this stamp set. But what steals the show? The gorgeous ribbon, of course!


Tips & Tricks:

*Although the gorgeous ribbon is the focal point on this card, I did add a bit of Dazzling Diamonds Glitter around the base of the tree and on the tree.
*A beautiful image doesn't need much embellishment. This card is quite simple, yet so beautiful and classic.
*Sure, the classic Christmas colors are red and green, but isn't this tree great in Marina Mist?

Hope you've enjoyed my marina Christmas tree - 'til next time, keep letting stamps bring out your creativity!

Wednesday, October 26, 2011

Christmas Lodge

I have loved the Christmas Lodge stamp set in the Holiday Mini since I first laid eyes on it. But I didn't get it. I already have Snow Swirled and didn't want to double up on Christmas Trees. But then I saw samples. And one of my customers ordered it. Then I got my Holiday Mini swaps with more samples. The final straw was actually using it at a SU! Demonstrator meeting. After that, I caved and ordered it :p I can justify it, of course. I will use it in my third Crazy 4 Christmas Class and will make my family's Christmas cards with it. See, justified :)

This lovely stamp set came yesterday so I had to make my card for Freshly Made Sketches with it of course. I took the idea of the scallop square and the lodge from Marlayne Hardy and finally got to ruffle my ribbon. The Seam Binding Ribbon is perfect for this because it's very fine and frays easily. I've always wanted to show this technique off but never did. As you can see, I changed my card up a bit from the sketch, but the idea is still there :)


Tips & Tricks:

*I love how the Mica Flakes in the Holiday Mini give the look of snow. An easy way to adhere them is using Tombo Multipurpose Liquid Glue.
*To ruffle your ribbon, choose one that frays easily. Pull a thread that follows the length of the ribbon out and keep pulling until you've got enough ruffle. Very easy technique but makes the ribbon look unique :)
*Christmas Lodge comes with two greetings: 'Merry Christmas' and 'Happy Holidays'. Both greetings are not just words ~ they're art as well.  I just love everything about this stamp set.
*The white cards stock on the scallop square was just too plain so I added some sponging in Early Espresso, giving the feeling of dusk and falling snow.

That's it for today ~ I have a class starting shortly and kids needing atttention :) 'Til next time, keep letting stamps bring out your creativity!

Monday, October 24, 2011

Dasher in Pewter

Although the Pewter Embossing Powder has been available for a couple of months now, I haven't really had a chance to show it off on my blog. Initially, I wondered what made this embossing powder so different from the Silver Embossing Powder.

I have used it a few times, but when I saw this week's Mojo Monday Sketch, I thought it was a perfect sketch for a pewter-embossed Dasher :) What is wonderful about this embossing powder is that it's thicker and gives a more thick, metallic feel to it. It would be a perfect embossing powder for the Faux Metal technique. Doesn't Dasher look elegant in pewter?


Tips & Tricks:

*The Letters to Santa DSP is perfect to make a variety of different-looking cards. There are many beautiful patterns and colors!
*Don't you just love the Mini Silver Brads? They're perfect for the little Jewelry Tags.
*Our Baker's Twine (available in White, Cherry Cobbler and Early Espresso) is perfect for any card: casual and fancier.

Hope you've enjoyed my metallic Dasher. 'Til next time, keep letting stamps bring out your creativity!

Thursday, October 20, 2011

Happy Christmas, Mate!

When I first laid eyes on this stamp set a number of years ago, I fell in love with it. The surfin' Santa, candy cane koala and gift-giving kangaroo ~ so fun! Only problem? It was only available in Australia/New Zealand! Well, imagine my excitement when my brother-in-law fell in love with a wonderful woman in Australia, a woman whom I got hooked on stamping ;) So when she returned after a visit to Canada, I asked her to send me the stamps. And Happy Christmas, Mate was mine. All mine :)

Then, a few week's back, my favorite now-retired DSP, Tropical Oasis, showed up on the Clearance Rack and I was able to order myself another package :) For today's Pals Paper Arts sketch challenge I used both of these products ~ hope you don't like this card too much because it may be a bit hard to reproduce ;) I love the tropical feel, even though it's a Christmas card :)


Tips & Tricks: 
 
*Create photo corners of any size with any SU! Square Punch: 1", 1-1/4" or 1-3/8". Punch a triangular notch into a piece of card stock, move your punch up over the notch and create your photo corner. Easy peasy! No need for a separate punch :)
*Add a bit of Dazzling Diamonds Glitter to Santa's beard to give it that silver-haired glimmer - nothing's better than a blinged up Santa.
*A Christmas card can be anything you want it to be :) Tropical paper with a surfing Santa fits the bill today!

Hope you loved my unconventional Christmas card. 'Til next time, keep letting stamps bring out your creativity!

Wednesday, October 19, 2011

Sliding Treat Cup Card - Tutorial

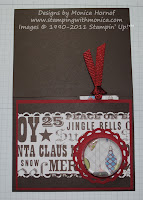
I recently did this type of card with my stamper's group. I found a few tutorials, improvised on them for the group, but didn't really like any of them. They weren't easy to follow, the photos in them didn't really help me and I knew I could make a better one :p So below is my own tutorial. The sketch I used is from Freshly Made Sketches. It works perfectly for the Treat Cup cards.


1. For your standard A2 card, cut a 8-1/2” x 11” piece of card stock for your base, a 5-1/4” x 4” piece of card stock for your mat and a 5” x 3-3/4” piece of card stock for your card front.


2. Decorate your card front with any designer paper, etc., that you will be punching through. Choose where you will be placing the Sweet Treat Cup and punch out a hole in your card base with the 1-3/4” Punch.


3. Place your card mat (Cherry Cobbler here) and card front (Early Espresso with Designer Series Paper) on your card base and position it as desired. DO NOT adhere.


4. Carefully flip the card over. With a pencil, trace the 1-3/4” circle through the card base onto the Cherry Cobbler mat. This will mark where you will punch out the circle for the top two layers.


5. Punch out the 1-3/4” circle through the top two layers of your card. Now all three layers of your card have the 1-3/4” circle punched through them and will align properly.


6. Remove the adhesive from the Sweet Treat Cup and adhere to the middle layer (Cherry Cobbler on this card). Adhere the top layer of your card (Early Espresso here) onto the middle layer, fitting the hole over the Sweet Treat Cup.


7. Cut a 2” x 4” piece of card stock for your slider. Position it over the hole in the card base (Early Espresso layer). Using Sticky Strip (to make sure that your card doesn't fall apart – the treat cup layer is quite heavy) create a 'frame' for your slider to slide in and out of and to keep it in the right spot. Put Sticky Strip on the rest of the card base and put your card together.

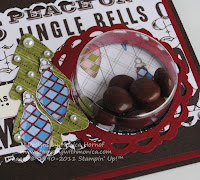
8. When you've put your card together, you'll see the slider through the Treat Cup as shown in the picture below. The slider goes between the middle layer and card base (Cherry Cobbler and Early Espresso).


9. Fill your treat cup from the inside of the card.


Funny thing, I didn't actually do any stamping on this card, except the Merry Christmas. But I did use a bunch of accessories including the Letters to Santa DSP, Perfect Pennants Bigz L Die as well as the Stocking Accents Originals Die. Isn't the Cherry Cobbler Waffle Ribbon just yummy? Love it!

Hope you enjoyed the tutorial and the card. Keep letting stamps bring out your creativity!