Showing posts with label Simply Beautiful. Show all posts

Saturday, October 6, 2012

Simplicity with Lacy & Lovely

As I mentioned in a previous post, fall colors in Ottawa are in full swing. And they're more gorgeous than ever this year. Every day they seem to be getting more intense, more colorful. The trees are full of colors like Cajun Craze and More Mustard. Which is why I thought that the Pals Paper Arts Challenge this week was so fitting. We were asked to use the colors More Mustard, Cajun Craze and Early Espresso.


Try Stampin' on Tuesday had a most fantastic sketch for us to work with this week, as well. So simple, yet so many possibilities! And we all know I just love to mix up different DSPs. Why stick to just one package? lol! On this card I mixed together Comfort Cafe and Candlelight Christmas.

Tips & Tricks:
*The Espresso pattern I used from Candlelight Christmas has large snowflakes on it, but I cut them off enough so it doesn't look as Christmas-y. Because that's not what I was going for ;)
*I'm loving the 7/8" Cotton Ribbon. You can stamp on it! And the Lacy & Lovely has stamps that are perfectly sized for it.
*I love stamp sets like Lacy & Lovely and Delicate Doilies. The larger stamps that work coordinate together are perfect for creating a custom look on any neutral surface. This card is super simple - just a Very Vanilla base with strips of DSP!
*Love flagging but can't get your card stock/ribbon flagged evenly on both sides? Check out this quick tip. Cut a slit down the centre of your card stock/ribbon (like on the Cotton Ribbon). Then cut from one corner of the DSP down to the end of the slit (you're cutting a diagonal, see the Candlelight Christmas DSP). Finally cut out the second notch from the opposite corner (like on the Comfort Cafe DSP). And voila - easy flagging!


I hope this card inspires you to simplify your cards a bit ;) Sometimes simple is best! To my Canadian followers, I hope you have a lovely Thanksgiving! 'Til next time, keep letting stamps bring out your creativity!


Card Recipe:
Stamps: Lacy & Lovely
Card Stock: Very Vanille, Candlelight Christmas DSP, Comfort Cafe DSP
Ink: More Mustard, Cajun Craze, Early Espresso
Accessories: 7/8" Cotton Ribbon

Tuesday, August 14, 2012

Build-a-Blossom 'Enjoy'

It's crazy - but I move on Saturday! SATURDAY!!! Can you believe it? I'm so nervous, so excited - I don't know what I am! I have packed up all my stampin' stuff which is a bit sad, but not before I made a few last projects. One of the cards I wanted to make was for the two ladies who purchased our current home. We will buy them a bouquet of flowers so that they have something pretty for their new home. But what is a gift without a thoughtful handstamped card?


This week's color challenge over at the Dynamic Duos Blog was to use Pretty in Pink and Certainly Celery. Perfect for a card to welcome two lovely ladies to their new home.

Tips & Tricks:

*I haven't used the Build-a-Blossom stamp set and coordinating punch in a while. I love how it has different sizes of petals as well as leaves.
*Since my background is Whisper White, I stamped tone-on-tone for both the petals and leaves.
*I love how everything SU! coordinates. The button is so perfectly Certainly Celery, just like the ink and card stock :) I did add a little piece of Lucky Limeade Baker's Twine in the centre of it ~ so I guess I cheated, lol!
*How much do you love the Holiday Frame Embossing Folder? I love it even more because it's not just for the holidays! I love how it looks with any larger image.

I really hope the new homeowners love their card. And thanks again for hanging in there with me while I blog a bit less. Soon I'll be all set up and ready to stamp up a storm! 'Til next time, keep letting stamps bring out your creativity!


Card Recipe
Stamps: Build-a-Blossom, Fabulous Phrases
Ink: Pretty in Pink, Certainly Celery
Paper: Pretty in Pink, Certainly Celery, Whisper White
Accessories: Build-a-Blossom Punch, Word Window Punch, Basic Jewels - Rhinestones, Big Shot, Holiday Frame Embossing Folder, Designer Buttons - Subtles, Lucky Limeade Baker's Twine, Mini Glue Dots, Stampin' Dimensionals

Wednesday, June 20, 2012

Thinking of You...

A friend of mine (and a fellow demo) has been going through a hard time. I had to drop off some things at her house so I included this card for her. I just wanted to let her know that even though we were both busy women, I was there for her and thinking of her. I know she loves the pink and brown combination, so I hope she liked this card.


I'm really loving the Clean and Simple Stamping challenge site that I stumbled across a few weeks ago. As the name would suggest, their sketches are 'clean and simple', just my style.

Tips & Tricks:

*I wanted a large scallop border at the bottom, to coordinate with the wider Crumb Cake Seam Binding Ribbon. I used my Tasteful Trim Bigz XL Die, cut out the border. Then I hid the seam between the border and cardstock on the top part of the card with the ribbon.
*The butterfly is from the Creative Elements stamp set. I cut it out with my Paper Snips. If you'd prefer to punch out a butterfly, check out the new Papillon Potpourri stamp set and coordinating Elegant Butterfly Punch.
*I wanted to make the butterfly pop! I stamped it in Early Espresso and then in Pretty in Pink and then I layered them. Love how it turned out.
*The scallop border looked a bit too plain to me. To fancy it up a bit, I added the Pearl Jewels to each scallop. Love these little embellishments!

I really hope this card brightened my friend's day. 'Til next time, keep letting stamps bring out your creativity!

Thursday, May 24, 2012

My Love of DSP

I'm going to warn you right now, this is going to be a super short blog entry. My 6-year-old daughter and I have been struck down by a particularly nasty flu bug. We've barely left the bed in nearly 48 hours and have consumed very little of anything. I've been planning this blog post for a few days so I have the card all ready to go.


I used the sketch from Clean & Simple Stamping for my card design and lucky for me, they leave their challenges open for two weeks ;) I've been waiting for a sketch to show off the flower vase patterned DSP from Summer Smooches and this one was perfect. I love gorgeous DSP, and I especially love making it a focal point on my cards.

This sketch is a keeper, for sure! I did omit a sentiment, I couldn't figure out how to fit it in and I think the card looks fine without it.

Tips & Tricks:

*Love the butterfly? I used the Blossom Punch and coordinating Mixed Bunch stamp set. Then, I trimmed out the middle 'petals' to make a butterfly.
*I layered two butterflies to give the element even more dimension. To make sure the wings lift up well, I used Glue Dots to stick the two butterflies together.
*When I cut out the middle petals, it looked a bit 'rough'. I used a button in Tempting Turquoise to cover up the imperfections.

This card took me less than 10 minutes to make ~ that's *my* kind of card! So use that DSP, don't hoard it ;) And keep letting stamps bring out your creativity!


Thursday, April 19, 2012

Long Time, No Stamp!

Wow, it feels like I haven't stamped for weeks ~ wait a minute, I haven't!!! Yesterday, I got back from Europe after a two-week 'holiday' with my family. I say holiday in quotations because travelling with a 3-year-old and a 6-year-old half-way around the world isn't much of a holiday. I joked with my husband that we may need to take a one-week trip to Cancun to relax ;)

In the meantime, we put our house up for sale and sold it - all while on holiday. Did you know you can sell a house over email, sending signed contracts as JPG pictures? Who would've thought? Needless to say, things have been a bit wild around here! And I was excited to get into my stamp room today and make a card for this week's Freshly Made Sketch. Clean, simple, fresh. Love these sketches. As you can see, I took a bit of a creative license with the 'shape' - there isn't one, just the 'rectangle' my images are stamped on :)


Tips & Tricks:
*Usually for this stamp set I would do a bit more antiquing, sponging with some Soft Suede ink as well as curling the edges of the card stock. Or maybe tearing a corner like in this card I've made before. But to keep my card 'fresh', I decided to forgo the antiquing this time.
*The Artistic Etchings stamp set is a perfect 'gender neutral' stamp set. I'm using this card at my Man Class this Friday night :)
*Love the greeting? It's from the Loving Thoughts stamp set in the Occasions Mini and only available 'til April 30th.
*Although the Lace Ribbon Border Punch is beautiful on its own, I love layering it with a ribbon. Gives you another option for using it.

I hope you've enjoyed this card and I promise, I will be back sooner than in 3 weeks ;) 'Til next time (really really soon) keep letting stamps bring out your creativity!

Sunday, March 25, 2012

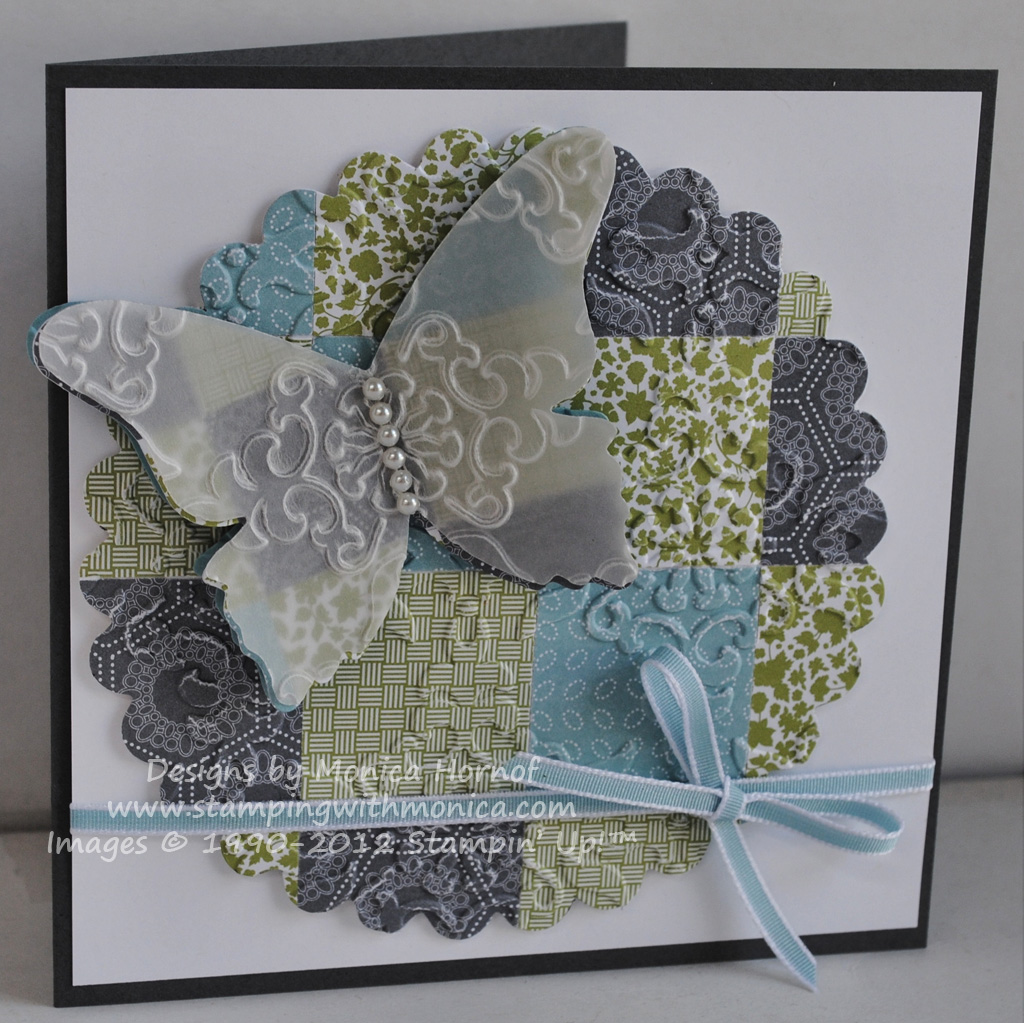
Quilting with Twitterpated DSP

When I started stamping, 4 years ago, I got my first package of DSP and was scared to use it. It was so pretty, I didn't want to use it 'wrong'. Then I got more DSP. And more. But I never wanted to use it! lol! How silly is that? I now tell my customers to not hoard their DSP and ribbon; they are very pretty but they're of no use to anyone if they are not being used.


So, now I crack open and use my DSP the minute I get it. I use it in my classes, private workshops, in my own projects. This also means I'm left with lots of scraps. For the Friday Mashup Challenge this week, we were asked to:
1) Make a project using the Quilting Technique; or
2) Make a project using something that has been forgotten (or sitting in our stash forever); or
3) Mash it up and create a quilted card with something that you've forgotten about.


I've used the Twitterpated DSP a lot so I had tonnes of scraps, perfect for 'quilting'. Even though the DSP has a lot of Blushing Bride colored patterns, I didn't want to do pink and focused on the Pear Pizzazz, Basic Grey and Baja Breeze.


For the 'forgotten' in my stash part of the challenge... I've used the Beautiful Butterflies die lots in the past and I love it, but it just hasn't been used lately. Same thing with my Vellum Paper. So I pulled them out and made my 3 layer butterfly.

Tips & Tricks:
*For my quilted scallop circle, I punched 1-1/4" squares out of the DSP and adhered them to a piece of card stock. Once they were all stuck on I ran it through the Scallop Circle Die. Then for a bit of extra texture, I ran the whole thing through the Vintage Wallpaper Embossing Folder.
*I love how vellum looks overtop DSP - you just see a hint of it through the vellum. I quilted the middle butterfly too.
*The base of the butterfly is just Baja Breeze card stock embossed with the Vintage Wallpaper Embossing Folder.
*I don't use the strips of adhesive jewels enough. I love how they 'bedazzle' my butterfly!
*Embossed Vellum is beautiful, but make sure you're using the Vellum Card Stock, not the Paper. The card stock is a bit thicker and holds up better.
*I don't often tie real bows, just cheater bows (knots). But the 1/8" Taffeta Ribbon is flexible enough to make tying a nice bow easy.

I'm not too sure who I made this card for yet. Though I think it may just be too beautiful to give away ;) 'Til next time, keep letting stamps bring out your creativity!

Thursday, March 22, 2012

Happy 43rd!

My parents were married the First Day of Spring. I find that incredibly romantic, much more so than Valentine's Day or Christmas weddings. There's something about spring. Sun, warmer weather, flowers blooming, birds chirping, new beginnings. It's also really easy for me to remember that it's their anniversary ;)


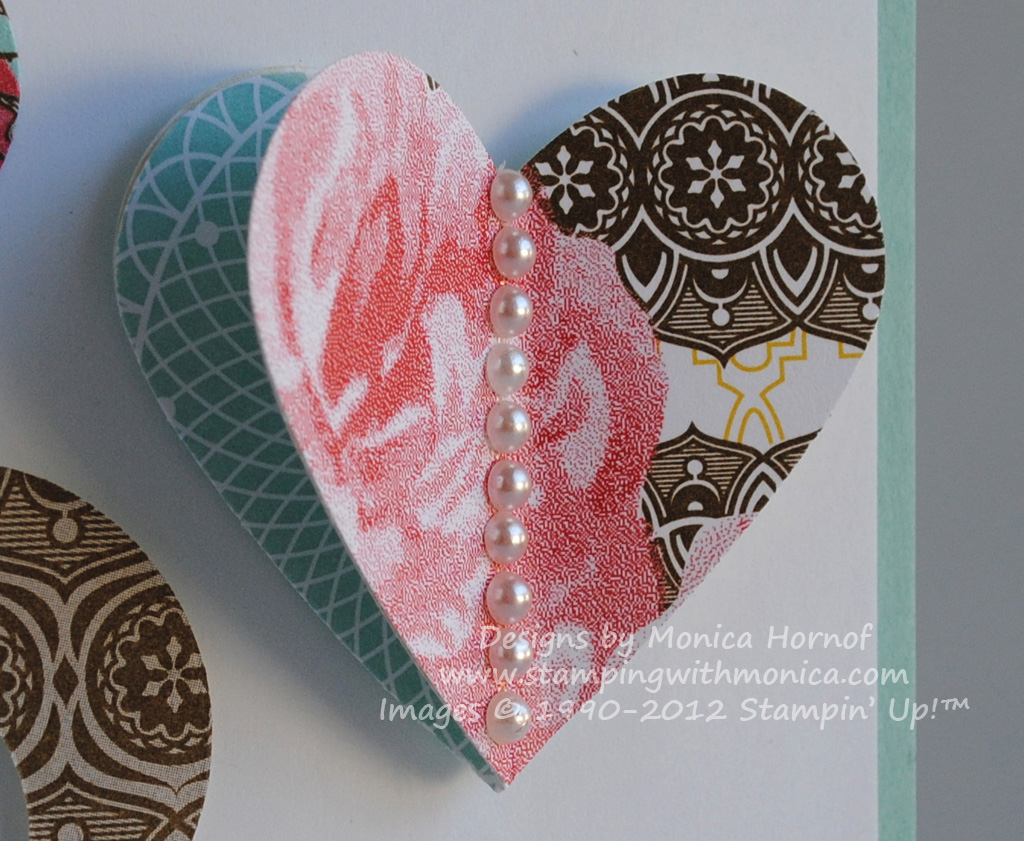
To celebrate these 43 years of marriage I made them a card. I went for a simple look today, based on this week's Freshly Made Sketch. Instead of circles, as suggested in the sketch, I pulled out my Framelits and used the hearts. This is definitely a unique sketch and I love how fresh and clean the card turned out. I used the Attic Boutique DSP which is full of fresh, romantic colors and flowers.

I'll be seeing my parents tomorrow and I really hope they like this card. I'm not 100% sure where I got the idea to make a heart frame and run a ribbon through it. But I love how it turned out! 


Tips & Tricks:

*Anyone who has stamped with me knows how much I love my 3D punched shapes. I've used the butterflies a lot, but lately I've been loving the 3D hearts.
*Aren't Adhesive Pearls just so romantic? I think they add a classic touch to the card.
*When making a frame with the Framelits, cut out the larger shape first and only then cut the smaller heart out to make your frame. This will prevent the Framelits from slipping onto each other.
*I contemplated using the Pool Party Seam Binding Ribbon but it seemed a bit too wide for the heart frame. I used the Ruffled Ribbon instead and I think it was just the right size.
*Sometimes less is more. I could have embossed the Whisper White Card Stock, I could have added some more embellishments, but for this card, I wanted to keep it simple and *fresh*.

I'll let you know next time what my parents thought. 'Til then, keep letting stamps bring out your creativity!

Monday, March 12, 2012

A Fabulous Floret

Wow - this decluttering business is making me too busy to stamp! Not good ;) But I did have a fantastic private stampin' class yesterday and I wanted to share one of this month's workshop cards. My hostess and her guests loved them and my hostess was very excited to walk off with $70 in FREE SU! product! Doesn't get much better than that :)

I used the Everyday Enchantment DSP on two of my workshop cards, so I thought I'd go in a totally different direction with this card. Also with spring just around the corner ~ it's so warm this week, I can feel it! ~ I wanted to do something that felt 'spring-y'. What's more spring-like than a beautiful Rich Razzleberry flower?


I haven't used Rich Razzleberry in much too long and I especially love it when it's combined with Old Olive.

Tips & Tricks:

*Want a look that is a bit different than the traditional bow? Tie a knot in the 1/4" Grosgrain Ribbon. It won't take away from your card but will add that little something extra you may need.
*I love the Flower Garden Embossing Folder. Actually ANY embossing folder, lol! But I wanted to show the ladies at my stampin' parties how much the texture adds to a card. This folder coordinates so well with the Fabulous Florets stamp set.
*As much as I love punches, sometimes it's nice to show new stampers that you don't *need* every single tool right away. I precut small strips of card stock and let the ladies flag and tease it apart to give it more dimension.

Another quick post! I'll be sure to show you my third stampin' class card later on this month. If you want to make this card and two other fabulous cards, you can join my Fast & Fabulous Class on March 28th or book your own private party! Hope to stamp with you soon and 'til next time, keep letting stamps bring out your creativity.

Wednesday, February 15, 2012

Packed for...

... Mom & Dad. Or Packed for Masculine & Feminine cards. Have you seen the four Packed for... stamp sets in the Occasions Mini? They're full of images perfect for men, women, baby and birthdays. I was prepping for my All Occasions Card Class on March 9th. I'm using the Create & Keep Simply Sent Kit for this class and I LOVE it! It has a card box, envelopes, card dividers and everything you need to make the cards! Of course, you can add a little extra ;)

Using this week's Freshly Made Sketch, I came up with my first two cards for my class. I love this week's sketch, it so simple, but makes it so easy to add a few special touches to a card. I used the Packed for Mom and Packed for Dad stamps.


In the center of the two cards is the card box which I embellished a bit (and you can embellish even more!). The kit comes with 10 designer cards, 2 each of 5 designs. I used the Early Espresso cards for my creations today.


Tips & Tricks:

*Love this Simply Sent kit but not sure what colors to use? SU! makes that easy - they tell you that the color palette is Early Espresso, Daffodil Delight, Pool Party, Calypso Coral and Pear Pizzazz.
*When I first saw the Packed for stamp sets I wasn't sure how to use so much line art. But the possibilities are endless! Spot color with our Stampin' Write markers (like I did), punch out the elements you like best or color the elements you like best. I'm sure you can think of many other things to do with these great stamps!
*Do you have a tough time making masculine cards? The Packed for Dad stamp offers many possibilities!
*The greetings and scalloped edge on the feminine card are both from the Simply Sent kit. I love all the options this kit offers.
*I love the ease of the adhesive die-cuts in our card and scrappin' kits. But sometimes I want to put them on Stampin' Dimensionals and the tackiness of our die-cuts actually gets in the way. To reduce tackiness, stick the die-cuts to your clothes a few times and then put them on Dimensionals.

Hope you've loved these class previews and you'll join me at my All Occasions Card Class. Not in Ottawa? Get the class to go! 'Til next time, keep letting stamps bring out your creativity!

Thursday, January 26, 2012

Sometimes Simple is Best

As you know, last week, I spent 3 days at Stampin' Up!'s Leadership Conference. I have a growing team of demonstrators and I wanted to make sure that I have all the tools and ideas to lead them effectively. This conference provided that and then some. I took a class called "Coaching for Performance", led by Jim Pitt and Natalie White from the SU! Home Office and though their coaching model is SUPER simple, it makes so much sense. It is based on Active Coaching and brainstorming with your downline/employees rather than dictating to them to develop a way forward for them. There are four main phases to this coaching: 1) establishing a goal, 2) examining reality, 3) brainstorming for options to meet the goal and 4) developing a way forward. I was lucky enough to have one of my downline be a guinea pig for me and it was great. Simple, I wrote everything down for her and even got a few pointers from her! lol! I can't wait to try it with more of my downline. Curious about building a business with SU!? Sale-a-Bration is a great time to join! Check out more info on my website.

I also love simple cards, cards that express what you're trying to say but that are elegant at the same time. They don't take long to make (10 or so minutes) but look like they took a lot longer. Put together a gorgeous DSP and an elegant stamp set and a card like that is easy! My inspiration for this card layout was from the gorgeous, simple sketch this week at Freshly Made Sketches.


I can't wait to give this card to my Leadership roommate - she was such a great roomie and I hope she loves it! You've seen me use the Rue de Fleurs stamp set in a card last week and believe it or not, this pen image is from the same stamp set! Although the stamp set is part of the Attic Boutique suite of products, I used the Twitterpated DSP. I love the Island Indigo color and how vibrant the pen looks stamped with it.


Tips & Tricks:

*Do you often rock your stamps? Especially the smaller ones? Make sure the ink pad you're stamping with is well inked and don't smoosh it in the ink. Tap gently. Then when stamping, be careful to apply even pressure without pushing down too hard. This should help eliminating those rock lines.
*If you're as picky as I am about even placement of brads, pearls, rhinestones, etc., look at this little trick I discovered with the grid from the SU! Mat Pack: the smallest rhinestones fit perfectly into the small placement holes, the medium ones into the bigger ones. Never again will my rhinestones be placed unevenly.
*When doing tone on tone, use Stampin' Dimensionals to pop up one of the layers. That way your colors won't just blend into each other.

Hope you've enjoyed this simple card as well as some of the coaching tips I learned at the Leadership Conference last week. 'Til next time, keep letting stamps bring out your creativity!


Tuesday, January 24, 2012

Sale-a-Bration... it's FINALLY here!!!

It's January 24, 2012. What does this mean? That Sale-a-Bration (SAB) starts TODAY! Yes, today! What does this mean? From January 24 to March 31 Stampin' Up! is offering:

*Customers: a FREE item from the Sale-a-Bration brochure for every $60 purchased (before tax and shipping). You can start shopping, 24/7, on my website :)

*Hostesses: A FREE, exclusive SU! tote in addition to regular hostess and SAB benefits when you host a workshop of $200 or more. When your workshop reaches $525, you'll get a FREE hostess bundle including the Fresh Vintage stamp set, Everyday Enchantment Ribbon & Brad Pack, and the Everyday Enchantment DSP (on pages 6-7 of the SAB Brochure).


*Demonstrators: Have you been thinking of joining SU!? Whether you just want the kit, you want to join for the discount or you want to give the business a go, this is THE TIME to join! The kit is only $150 (no tax or shipping) and includes over $385 in products! Not only that, you'll get a free package of DSP or a free Digi Download every month from February to December 2012! Get more info on joining here.

To celebrate the start of Sale-a-Bration and to make use of this week's fabulous Mojo Monday sketch, I made this thank you card for my wonderful roommate at Leadership, as well as for my monthly Fast & Fabulous class tomorrow.


Tips & Tricks:

*Love the DSP? So do I and every other demonstrator it seems! It's the gorgeous Everyday Enchanment paper in this year's SAB brochure. Love all the patterns and colors, especially the 'fan'-like pattern. It coordinates perfectly with the SAB Fresh Vintage stamp set.
*How about that ribbon? Because the organdy is slightly translucent, it lets some of the DSP behind it peek through. It's also got a shimmery look to it! In the SAB Ribbon and Brad Pack, you get a roll of Calypso Coral and Lucky Limeade Ribbon, as well as coordinating brads! Now *that* is a deal!

As you can see, now is the time to host your own stamping party or get the starter kit! Have any questions? Feel free to contact me anytime: stampingmonica@gmail.com. 'Til next time, keep letting stamps bring out your creativity!

Tuesday, January 10, 2012

A Yummy Birthday Card

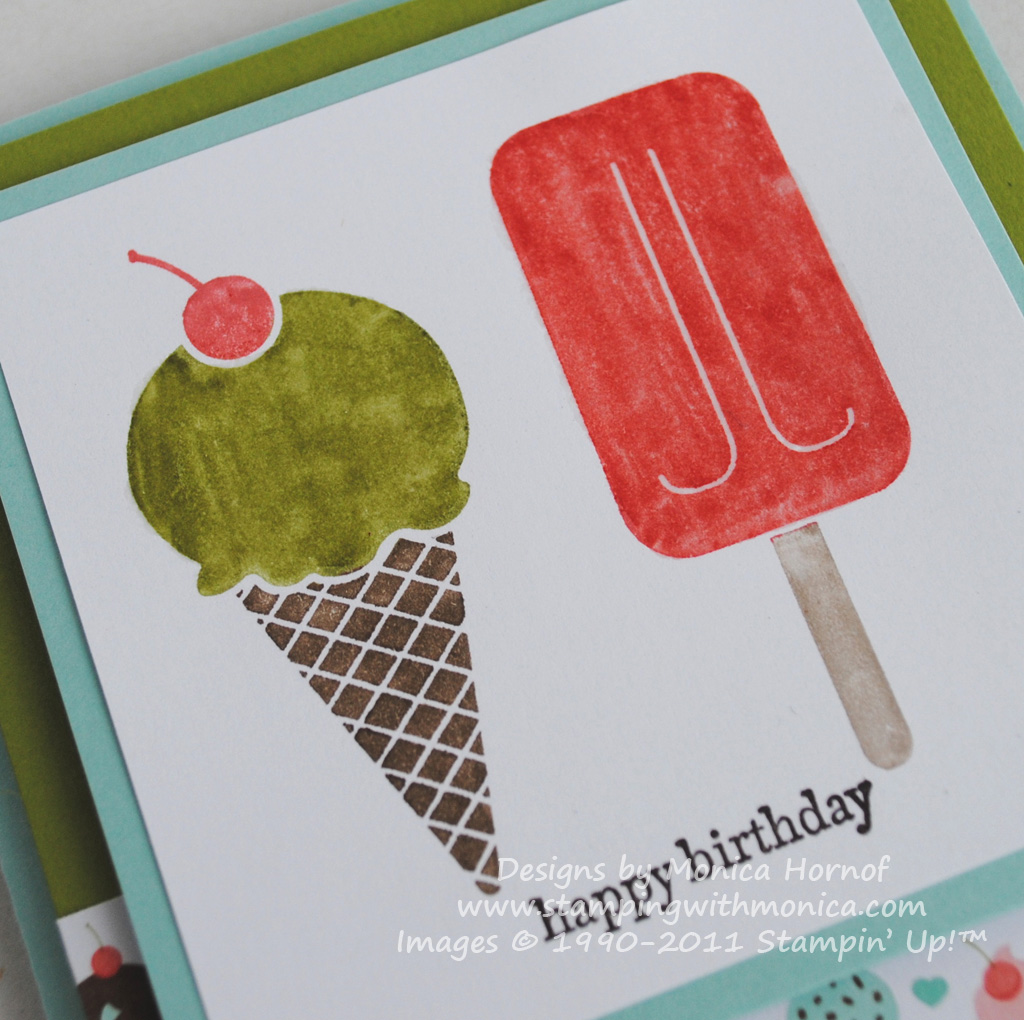
Happy Birthday!!! I'm trying a new challenge this week, the Friday Mashup. Every week, the give us two challenges and we can 1) do one challenge, 2) do the other challenge or 3) 'mash up our creativity' and do both on one card. This week we were asked to make a birthday card and/or use pastel colors on the card. For my first Mashup, I did both :)

I also needed to make a children's card for my Birthday Card Class this Friday ~ so I once again used this challenge to help me along in my class prep :) I'm so busy ~ I can only do so many things at a time so if I can kill two birds with one stone, I will!


After using my cherry-scented embossing powder last week, I was itching to try my melon-scented and vanilla-scented powders as well. I know my ice cream cone is green, but there is no pistachio-scented embossing powder and I wanted to use Lucky Limeade on my card, so vanilla-green it was :) And the melon... mmmmmmmmmm. Think melon-flavored Jolly Ranchers... yummmmmmmy! Love these powders!


Tips & Tricks:

*I used markers to color my stamps and then use my Versamarker overtop the colored images. Then I applied the Scented Embossing Powders and heat embossed them! Super easy to use :)
*Don't you love how the Mouthwatering stamp set coordinates perfectly with the Sweet Shop DSP? Stampin' Up! makes coordination so easy - that's one of the things I love best about their products.
*The Occasions Mini offers Baker's Twine in all of the 2011-2013 In Colors. I love the Twine because it's so cost effective ($3.95 for 25 yards!) and you can wrap it around the card a few times without giving it a second thought :)

Hope you love this card and hope it's tempted some others to join us on Friday at my class! 'Til next time, keep letting stamps bring out your creativity!

Wednesday, November 30, 2011

Design Shake-up

I have my monthly Fast & Fabulous Class tonight and the ladies are going to make 6 gorgeous Christmas cards. I do this class the last Wednesday of every month and it's always a big hit! I had a few Christmas card kits left over and ran out of Whisper White Card Stock... again (it's been a busy season!) so I decided to shake-up one of my previous designs. I also made it work with this week's Freshly Made Sketch. When you're as busy as I am, you have to multitask ;) Here is the original:


Based on this sketch


I came up with the card below. Not sure which one I like better, though I'm leaning to this new one :)


Tips & Tricks:

*I love SU!'s A la Carte stamps, such as the one above. I ink up my Something for Christmas stamp, stamp it down and voila - my card is almost done!
*You can't go wrong with punches, stamps, DSP and ribbon. Five minutes and this cute card was done!
*Want to stamp in bulk but not make the same card over and over? Try changing up the design just a bit on each card. Keeps your creativity going wile simplifying your card prep.

I hope you've enjoyed this card. Can't believe tomorrow is December and we'll *really* be in the Christmas season. I have one last Christmas card class next week so if you need more cards, don't forget to sign up :)

'Til next time, keep letting stamps bring out your creativity!